PHDwin V3.1.19 is live.
View our Release Page Need the IT installer? Get the .MSI
Happy Holidays! We’re grateful for your support and wish you a joyful season.
View our Release Page Need the IT installer? Get the .MSI
Happy Holidays! We’re grateful for your support and wish you a joyful season.
With a concurrent-user/Network License, you can install PHDwin on multiple computers. However, the number of users who can access PHDwin at the same time is limited to the number of concurrent licenses purchased. To set up the concurrent-user/network license, follow the steps below:
To use PHDwin in a Concurrent-User/Network License Server, you will need to request a license by completing the following steps:
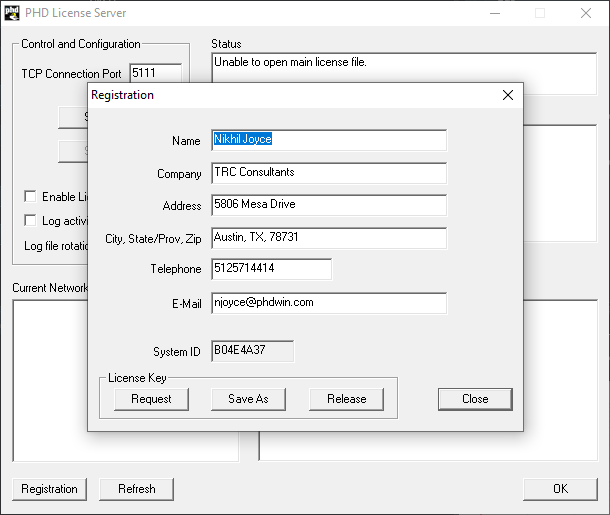
After receiving two emails with unlock code files attached, you will need to save them as follows:
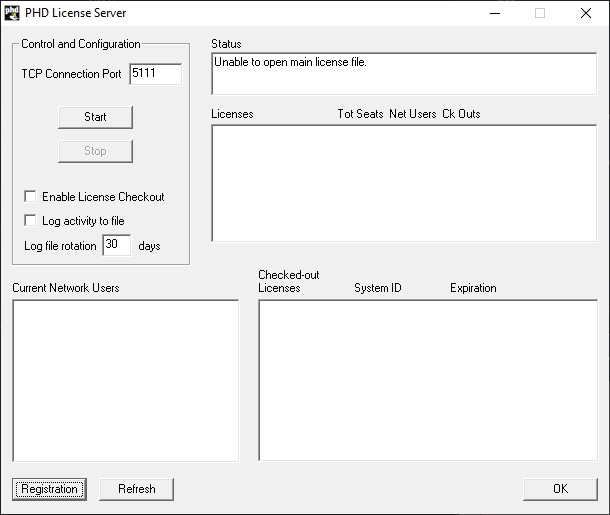
Once you have received the unlock codes and saved them to the PHDwin License Server installation directory, you need to start the license server application by selecting Start. If the unlock codes are valid, the status of the License Server should say “Accepting License Requests”.If it says it is unable to open the main license file, try re-saving the files or contacting support. The first thing to check will be to make sure that no characters have been added to the name of the license files such as an underscore to the beginning of the file name. This is a common issue with text attachments being sent via Outlook. The file names are: PHDWin License Server.lic and PHDWin US.lic.
The License Manager also has several features that can be helpful to users. The application indicates:
Status & Licenses: how many unlock codes are available on the license.
Current Network Users: how many network users are currently logged in (and which users they are).
Checked–out Licenses: how many unlock codes have been checked out
**.MSI does not include SQL Server Express or any of the PHDwin V3 dependencies.**
Compared to a .exe file, an .msi file provides additional capabilities, such as the ability to customize the installation process, perform administrative installations, and support features like repair and uninstallation through the Windows Installer service. In summary, the key difference between V3 .exe and V3 .msi lies in the installation method and the capabilities provided by the respective file formats. A .exe file is a standalone executable that guides you through the installation, while an .msi file is designed for use with the Windows Installer technology, allowing for more advanced installation and management options.
System administrators can use the V3 .msi file to perform silent installations, which means the installation process runs without any user interaction or prompts. This is useful when deploying software to a large number of computers simultaneously, as it allows for automated and unattended installations.
Additionally, the .msi format supports customization options, allowing administrators to modify the installation behavior, set default configuration settings, and apply specific policies during the installation process. It also provides features like repair and uninstallation, making it easier to maintain and manage software installations across multiple machines.
Overall, the V3 .msi file is intended for use by IT professionals who are responsible for software deployment and management in enterprise environments or large-scale deployments.
The PHDwin License Server is a component of the PHDwin software that manages the licensing and usage of PHDwin within an organization. It acts as a central server where licenses are stored and distributed to users who want to run PHDwin.
The license server ensures that only authorized users can access and use PHDwin by validating the license information. When a user wants to run PHDwin, they connect to the license server to request a license. If the license server confirms that a license is available, it grants permission to the user, allowing them to use PHDwin.
The license server also provides information about the number of available licenses, the number of users currently logged in, and any licenses that have been checked out or reserved. This helps organizations keep track of their license usage and ensure compliance with the terms of their licensing agreement.
Overall, the PHDwin License Server helps organizations manage and control the licensing of PHDwin software, ensuring that it is used by authorized users and in accordance with the licensing terms.
In the context of the PHDwin License Server, licenses refer to unlock codes that are associated with a specific software license owned by an organization. These unlock codes are essentially unique codes or keys that enable the organization to use PHDwin software.
When an organization purchases a license for PHDwin, they receive unlock codes that correspond to the specific license agreement they have. These unlock codes are then stored in the PHDwin License Server. Each unlock code is linked to a single license, allowing the organization to activate and use the software on the specified number of machines or for the agreed-upon number of concurrent users.
The PHDwin License Server acts as a repository for these unlock codes. When a user wants to use PHDwin, they connect to the license server and request a license. The license server checks the availability of licenses and, if a license is available, grants permission to the user to access and use the software.
In this way, the unlock codes, which are essentially licenses, are managed by the PHDwin License Server to control and regulate the usage of PHDwin within the organization. The license server keeps track of the number of available licenses, the number of users currently logged in, and any licenses that have been checked out or reserved, ensuring that the organization complies with the terms and conditions of their license agreement.
So, in summary, licenses in the context of the PHDwin License Server are represented by unlock codes that are associated with a specific license owned by an organization, and the license server manages the distribution and usage of these licenses.